Pages

Monday, February 25, 2013

Funnies

While recuperating, I thought I would share something funny that my husband found on YouTube.

This just cracks me up!

Friday, February 22, 2013

Avocado + Knife = No Knitting or Spinning

I hurt my left hand the other night, trying to pit an avocado.  Hard to type with one hand, so details later.  For now, no fiber arts for me for a little while.  :(


I'll be back soon!


Tuesday, February 19, 2013

Smells like wool!

    Image of sheep from FreeFoto.com.  Text added by me.  

I'll admit it, I LOVE THE SMELL OF WOOL!  I'm currently drying some yarn I spun, and it just fills my living room with that wonderful smell.  You probably think I'm crazy, but there's just something about that smell!  It's just so natural!  Maybe it reminds me of the goats I had when I was a kid.  Maybe it's the smell of something pure...not treated with chemicals or detergents.  Whatever it is, I always love washing my spun yarn and having that smell waft through the apartment.  My husband may disagree, but it's a pleasant smell to me.  

My homespun drying on a clothing rack.
Using spray bottles to weigh down the yarn to help work out some of the kinks.


Kryptonian Sunrise Brioche Cowl!

You're going to need sunglasses for this one!  
Feast your eyes on my Kryptonian Sunrise Brioche Cowl!  :)  

Pattern:  Metamorph

Length of time to complete:  Little less than a month

Lessons learned:  Brioche, 2 color-brioche in the round, extra stretchy bind-off, sewing backing buttons

Yarn:  Knit Picks Bare Fingering:  I dyed both of these colorways myself.  Gerbera Daisy Colorway for inside, and Denim colorway for outside.  


Needle Size:  US 5 for the entire thing.  

Accessories:  Yellow and red buttons purchased at Joann's.  2 POW buttons purchased on Etsy.


Helpful websites to help with this pattern:
Carry Along KAL:  Metamorph KAL on Ravelry
Color Brioche Stitch in the Round
Picking up Dropped Stitches in Brioche Knitting
Fixing Mistakes in Brioche Knitting

I'm so pleased to have finished this cowl!  I'd like to give a few SHOUT-OUTS to people who helped me with this...

*My friend, Elizabeth, who has become quite the Brioche Master.  
*The woman who created this pattern, Jeny Staiman.  She gave me lots of advice as I was working my way through this.    

This cowl is rather awesome!  It goes from a knit tube, to a cowl that can be worn multiple ways!  
A square tube.  You can see the stitch markers at the bottom showing where I will sew on my buttons.  

 One way to wear it, with the buttons aligned with their buttonholes.  Shown above.


Another way to wear it...turned inside out and buttoned.


And yet ANOTHER way to wear it, buttons offset by 4 buttonholes.  When you offset the buttonholes, you get a very cool mobius effect.  You can offset by 2, 3, 4, whatever you like!

I came up with the name "Kryptonian Sunrise" from the color scheme.  I knew what colors I wanted for this cowl when I dyed the yarn, and for some reason, Superman and Supergirl kept popping into my mind.  Probably because I watch A LOT of the "Big Bang Theory" on TV while knitting.  They are always talking about comic books on there, so I think the idea of Krypton stuck in my head as I made this cowl.  I was lucky to find the 2 wooden POW buttons on Etsy for this!  They were just perfect for the comic book theme.

Though I had trouble getting started with this cowl, I'm so happy I stuck with it to completion.  I learned lots of new techniques with this pattern and now have an awesome cowl to wear!


Thursday, February 14, 2013

A Beret in less than 3 Days


It has been a while since I've knitted a beret.  I started knitting berets when I lived in France (2008-2009), and since then, I've knitted a few for friends, family, and myself.  I have a beret that I knitted in France that I wear almost every time I go out in the winter.  Now that I'm spinning my own yarn, I wanted to knit up a new beret with my hand-spun yarn.

My "Blue Lagoon of Beavercreek" yarn called to me to become a beret.  I began pattern searching on Ravelry, which can take quite a bit of time.  There are so many pattern to go through to find  just the right one.  I wanted something a bit different than the one's I've done in the past, and something that would fit the yarn requirements of my hand-spun.  Voila!  I found Elfunny Beret by FadenStille.  This pattern was fairly easy.  It does have a chart, and I'm usually not fond of charts, but this one was easy to memorize as I went through the rows.  It also helped to use stitch markers to section out the 12 stitch repeats so that I could easily find, and fix mistakes as I went.  If you do this pattern, be careful with the yarn overs near the stitch markers.  They can slip from one of a stitch marker to the other, and cause your count to be off.  

I used size 5 and size 7 interchangeable needles with 16" cord.  

I was able to knit this up in less than 3 days.  To block it, I put it over a dinner plate to dry.  I highly recommend blocking berets on dinner plates, because it really helps to stretch out and show your pattern better.

So happy with how this turned out!  The yarn was perfect for this pattern!  I only used 149.94 yards of my yarn on this.  The colors swirl perfectly all the way to the top.  
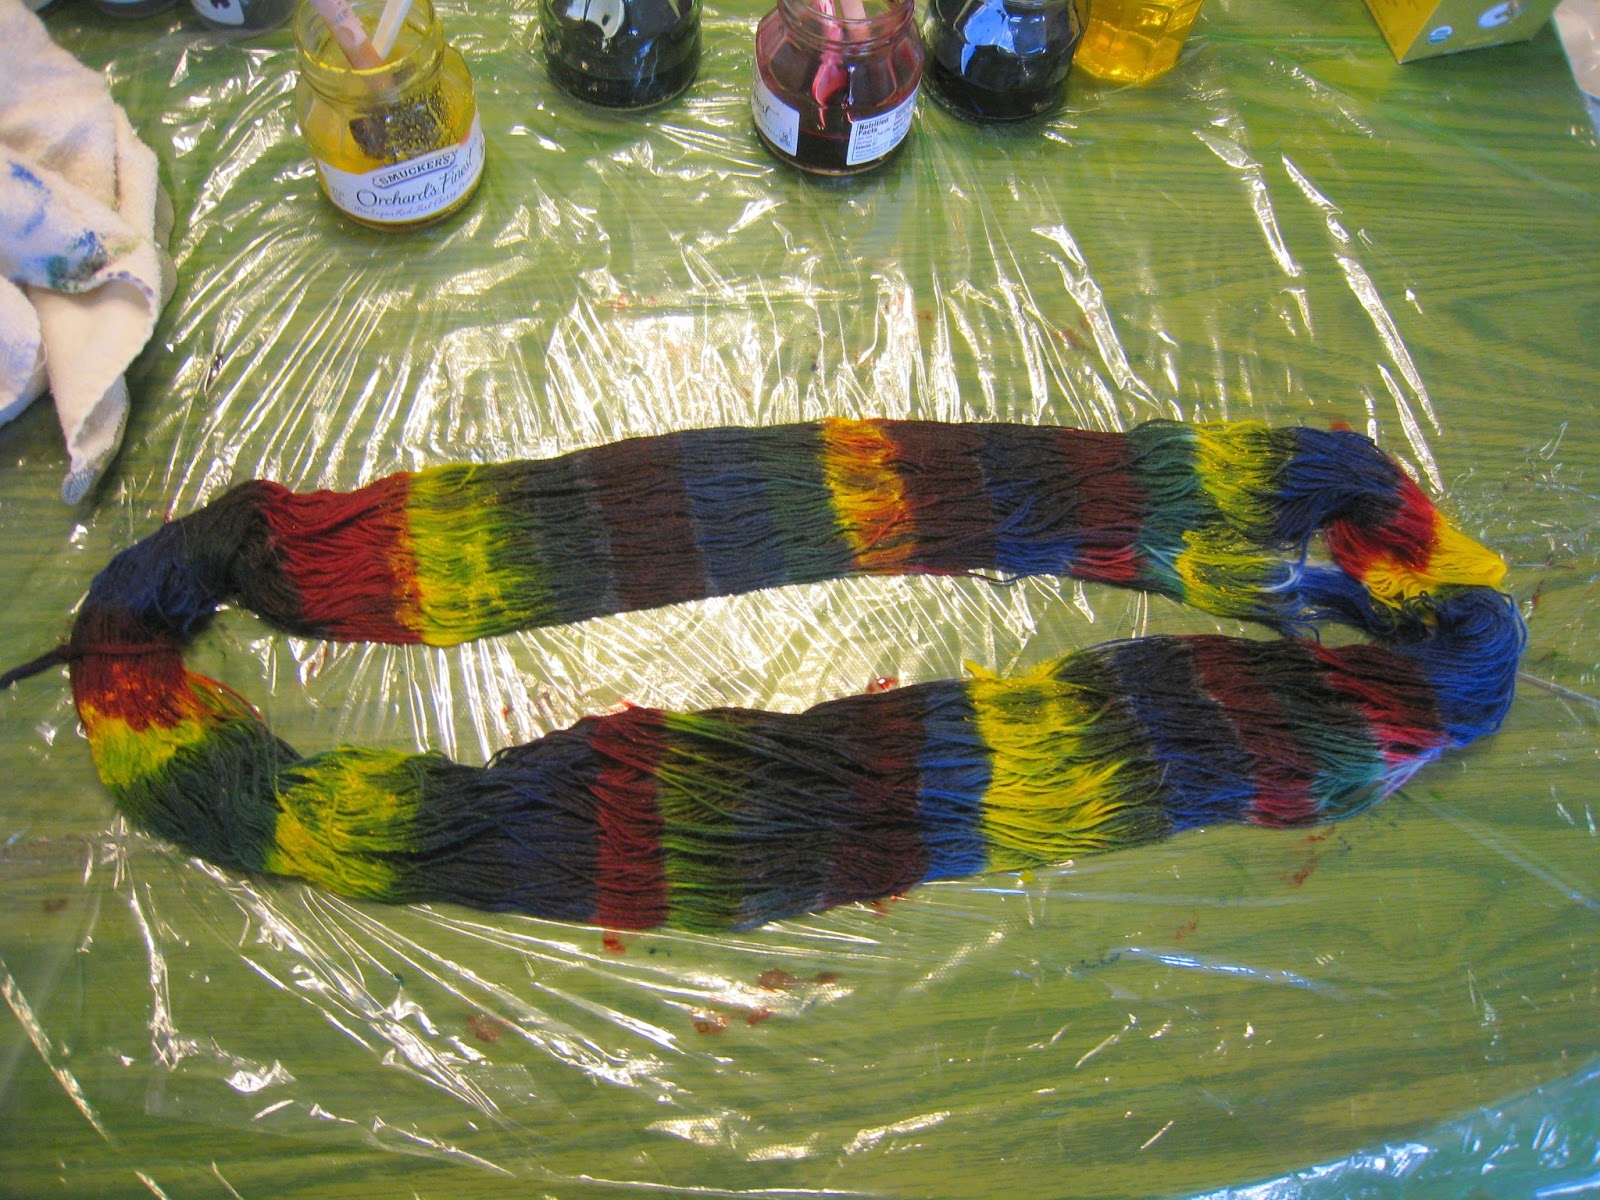
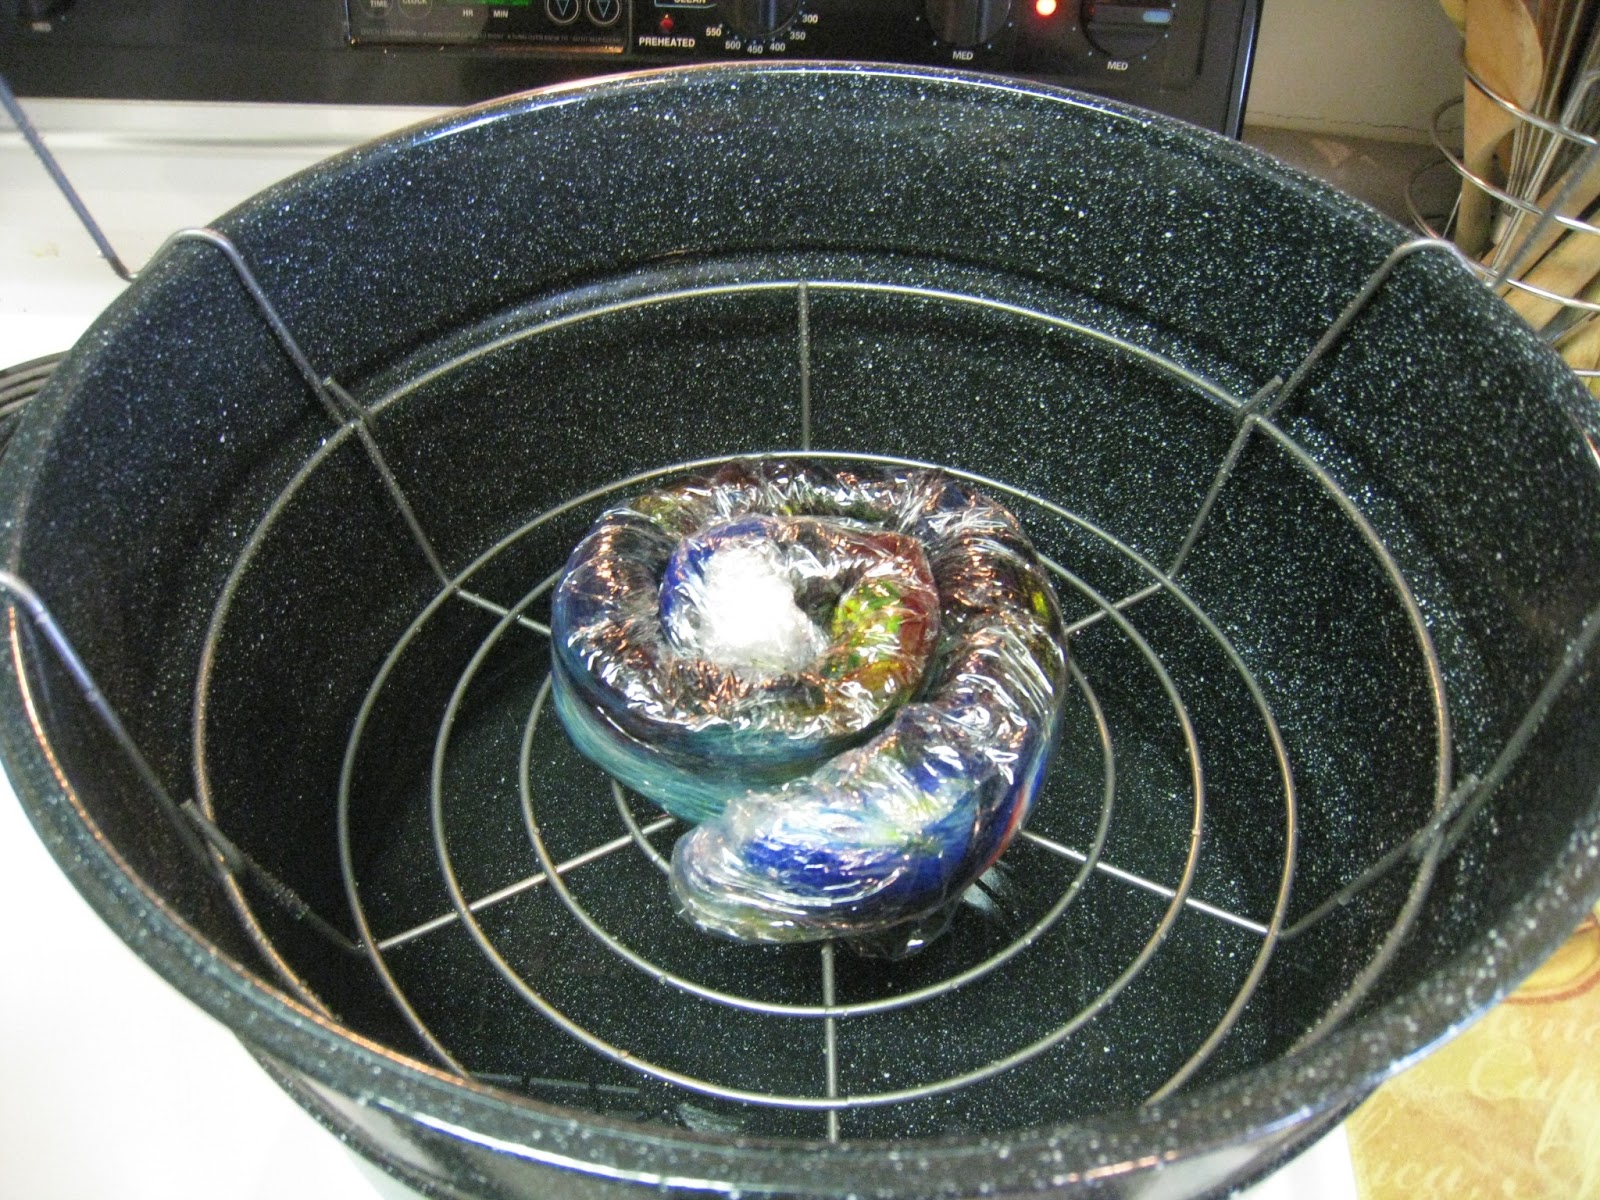
From this....

To THIS!  :)

My "Blue Lagoon Swirl Beret"!

Wednesday, February 13, 2013

My First Dye-A-Long

On Monday, February 11th, I participated in my first Dye-A-Long on Ravelry with the Greener Shades group.  It was very informative being able to talk to others as I was working through the process.  I even learned a few new things (which is always good!).  

I decided to dye some Universal Yarn Ready to Dye Collection Wool/Nylon Sock Weight yarn and some Superwash BFL roving (4 oz).  

My Tools:
*Greener Shades Dyes
*Gloves & Apron
*Jars (using old jam jars)
*plastic spoons
*sponge tipped brushes
*thermometer
*2 bowls
*measuring spoons
*Plastic sheet
*Plastic wrap

*canning pot (I have a huge one for dyeing
*face mask- pulled out my husband's "Walter White" ventilator mask for this.  I started with the mask on the right, but I was getting a buzzy headache.  The one on the left worked much better for me, even if I do look ridiculous.  :)  
*Citric Acid
*Dish soap

Oreo says "**REMEMBER:  Anything used for dyeing should NOT be used for cooking.  Keep dye stuff and cook stuff separate!**"

Prep:
About an hour before the dye-a-long, I prepped my yarn and roving by soaking them in warm water and a couple of drops of dish soap.  I rinsed the yarn & roving after about 40 min, and let it continue to soak in warm water.  Then I soaked the yarn & roving in 3 tbs citric acid and warm water for about an hour or more (I should note that I soaked the yarn and roving in separate bowls, not together).  The roving soaked longer since I was working on the yarn first.


Soaking my roving

Soaking my yarn
I also took time to cover my table with plastic, and set up all the tools I'll need.  I put out a couple of sheets of plastic wrap (saran wrap) on top of the plastic table cover.  

Also thinking about what colors to use.  I have a color wheel that I use to get ideas, but also like to look online for inspiration.  It's always fun thinking about color combinations!

My workspace!


Process:  YARN
I wanted to try something new for this dye-a-long.  I've used the microwave and the crock pot for heating my yarn/roving before, but I wanted to learn how to steam it in a canning pot on the stove.    

Starting with the yarn, I wrung it out a little (it has nylon in it so I could be a bit rougher with it than if it were pure wool), and then put it on the plastic wrap.  I made my dye stocks, using 1 gram of dye per 100ml water.  Since I didn't use a scale, I used the measurement chart in the Greener Shades group, which showed me that 1 gram of the colors I chose was about 1 tsp.  I used Sunshine Yellow, Amazon Green, Ruby Red, and River Blue.  Using my little jam jars, I mixed up each stock.  A trick I learned is to use warm tap water to mix up the stock.  It really does help to get the powder to blend faster.  I would like to get an immersion blender to use in the future.  The yellow clumps and an immersion blender would be helpful with that.   

My dye stocks.

I used sponge brushes to paint the dye stock onto the yarn.  I like to just go with the flow and add color where ever I like without forethought.  Just a little yellow here, a little green there, and so forth.  Sometimes, it's just fun playing around and seeing what you come up with instead of having a set goal in mind.  

Ready to paint!
Adding dye to the yarn with a sponge brush.  One color at a time.
BEAUTIFUL!  
After I finished one side, I picked it up to turn it over.  MISTAKE!  The colors bled together and I got dye stock everywhere.  It would have been better if I just pressed the colors into the yarn more and worked on each section, rather than moving the yarn.  But I was tired, doing too many things at once, and wasn't thinking.  So learn from my mistake.  (Though in the end, the yarn still came out really cool!  Sometimes, messing up can create really amazing effects!  Don't beat yourself up if you screw something up along the way.  Just wait and see what happens in the end.)

Muddled colors after picking it up and turning it over.  Added more dye to fill in the white spots.
I rolled up the yarn in the plastic wrap like a jelly roll.  Next, I put 2 inches of water into my canning pot, put the canning rack in, and the jelly roll on top of that.  Covered it, turned the heat to med high, and let it cook.  I was told 20 minutes to 200 degrees, but I'm not sure that worked so well.  The color didn't completely set, and it ran a lot afterwards.  I'm thinking it was mostly the yellow since it was somewhat clumpy.  I've not had problems with exhausting the color in a microwave before, or crock pot, so not sure why this happened on the stove.  Investigating further and will let you know if I figure it out.  I should have just used the microwave heat method.  

Yarn wrapped up like a jelly roll.

Ready to steam in my HUGE canning pot.  It looks so small in there.


I rinsed the yarn over and over and let it soak with some vinegar water until it ran pretty much clear.  Then hung it to dry on the clothing rack.  

Yarn drying on my clothing rack.  Bucket underneath to catch water.
ROVING

Gently pressed some of the excess soak water out and put the roving on the plastic wrap.  I used Amazon Green, Ruby Red, River Blue, and Amethyst Purple.  I started out sponge brush painting little sections, but at this point, I was tired, and didn't want to continue doing that.  Instead, I just start dabbing colors all over the place.  Then I turned it over, and did the same thing on the back.  Random splotches of color all over the place!  

Ready to paint again!

Started off painting strips, but then got really tired and bored, so started to just go CRAZY!  

Dotting colors EVERYWHERE!


I wrapped it up in the plastic wrap, jelly roll style, and put it into the steamer as I did the yarn.  I heated it for 20 minutes and then let it cool.  When I rinsed it, the colors didn't run, so I was very pleased with that.  Now it's hanging to dry on my clothing rack.

Steaming my roving on the stove.


Drying the roving.
This completed the dye-a-long.  Thanks to Sarah and the others for their help and advice!

MORE YARN!
Figured, while I had my dye stuff out, I'd go ahead and dye some more yarn.  

This time I used Knit Picks Bare Superwash Wool Worsted Weight, 100grams.  I soaked it in water only for 30 minutes or so.  Set up my crockpot by a heaping teaspoon of River Blue in there and filling with water...maybe 6 cups or so, didn't measure.  Then turned it on HIGH for 30 minutes.  Checked the temp and it was 100 degrees F, so put the yarn in at that point, moved it around a bit, and added 2 Tbs of citric acid.  Checked the temp again at 20 minutes.  140 degrees F, color was not fully exhausted.  Put it on for another 20 minutes. 

Yarn dyeing in my crock pot.
Checked temp, 160 degrees.  Still some white spots, so I moved it around, spooning a little more powder onto the yarn.  Lid back on, and going to check again in 20 minutes.  Dye bath was exhausted, so turned off the heat and let it cool before rinsing.  

The blue came out much better than last time I did it!  Much more of a solid blue color with some darker spots rather than lighter spots like before.  


THE RESULTS!  :)  

LOVE this yarn!  This was the yarn I first dyed using the canning pot steamer method.  I call it "Happenstance"

The other side of "Happenstance"
Pictures showing the different colors in "Happenstance" as I wind it into a cake.


"Happenstance" all wound up into a cake, ready to knit!

Really happy with how this turned out!  Again, mistakes can lead to some great color combinations sometimes! 
My colorful roving!  It may not look so great now, but I think it's going to spin up into something lovely!  I am calling this one "Muddled Mystery."

And my blue yarn!  I shall name this one "Royal Twilight."
All caked up and ready to knit!


LESSONS LEARNED:
*Mistakes can cause some gorgeous colorways.  
*Be careful picking up and turning over your hand painted yarn or roving.
*Be sure to cook your yarn long enough to exhaust the colors.  20 minutes is NOT long enough!
*How to make dye stock using Greener Shades dyes.