
I decided to dye some Universal Yarn Ready to Dye Collection Wool/Nylon Sock Weight yarn and some Superwash BFL roving (4 oz).

 My Tools:
*Greener Shades Dyes
*Gloves & Apron
*Jars (using old jam jars)
*plastic spoons
*sponge tipped brushes
*thermometer
*2 bowls
*measuring spoons
*Plastic sheet
*Plastic wrap
*canning pot (I have a huge one for dyeing
*face mask- pulled out my husband's "Walter White" ventilator mask for this. I started with the mask on the right, but I was getting a buzzy headache. The one on the left worked much better for me, even if I do look ridiculous. :)
*Citric Acid
*Dish soap

Prep:
About an hour before the dye-a-long, I prepped my yarn and roving by soaking them in warm water and a couple of drops of dish soap. I rinsed the yarn & roving after about 40 min, and let it continue to soak in warm water. Then I soaked the yarn & roving in 3 tbs citric acid and warm water for about an hour or more (I should note that I soaked the yarn and roving in separate bowls, not together). The roving soaked longer since I was working on the yarn first.
 |
| Soaking my roving |
 |
| Soaking my yarn |
Also thinking about what colors to use. I have a color wheel that I use to get ideas, but also like to look online for inspiration. It's always fun thinking about color combinations!
 |
| My workspace! |

Process: YARN
I wanted to try something new for this dye-a-long. I've used the microwave and the crock pot for heating my yarn/roving before, but I wanted to learn how to steam it in a canning pot on the stove.
Starting with the yarn, I wrung it out a little (it has nylon in it so I could be a bit rougher with it than if it were pure wool), and then put it on the plastic wrap. I made my dye stocks, using 1 gram of dye per 100ml water. Since I didn't use a scale, I used the measurement chart in the Greener Shades group, which showed me that 1 gram of the colors I chose was about 1 tsp. I used Sunshine Yellow, Amazon Green, Ruby Red, and River Blue. Using my little jam jars, I mixed up each stock. A trick I learned is to use warm tap water to mix up the stock. It really does help to get the powder to blend faster. I would like to get an immersion blender to use in the future. The yellow clumps and an immersion blender would be helpful with that.
 |
| My dye stocks. |
I used sponge brushes to paint the dye stock onto the yarn. I like to just go with the flow and add color where ever I like without forethought. Just a little yellow here, a little green there, and so forth. Sometimes, it's just fun playing around and seeing what you come up with instead of having a set goal in mind.
 |
| Ready to paint! |
 |
| Adding dye to the yarn with a sponge brush. One color at a time. |
 |
| BEAUTIFUL! |
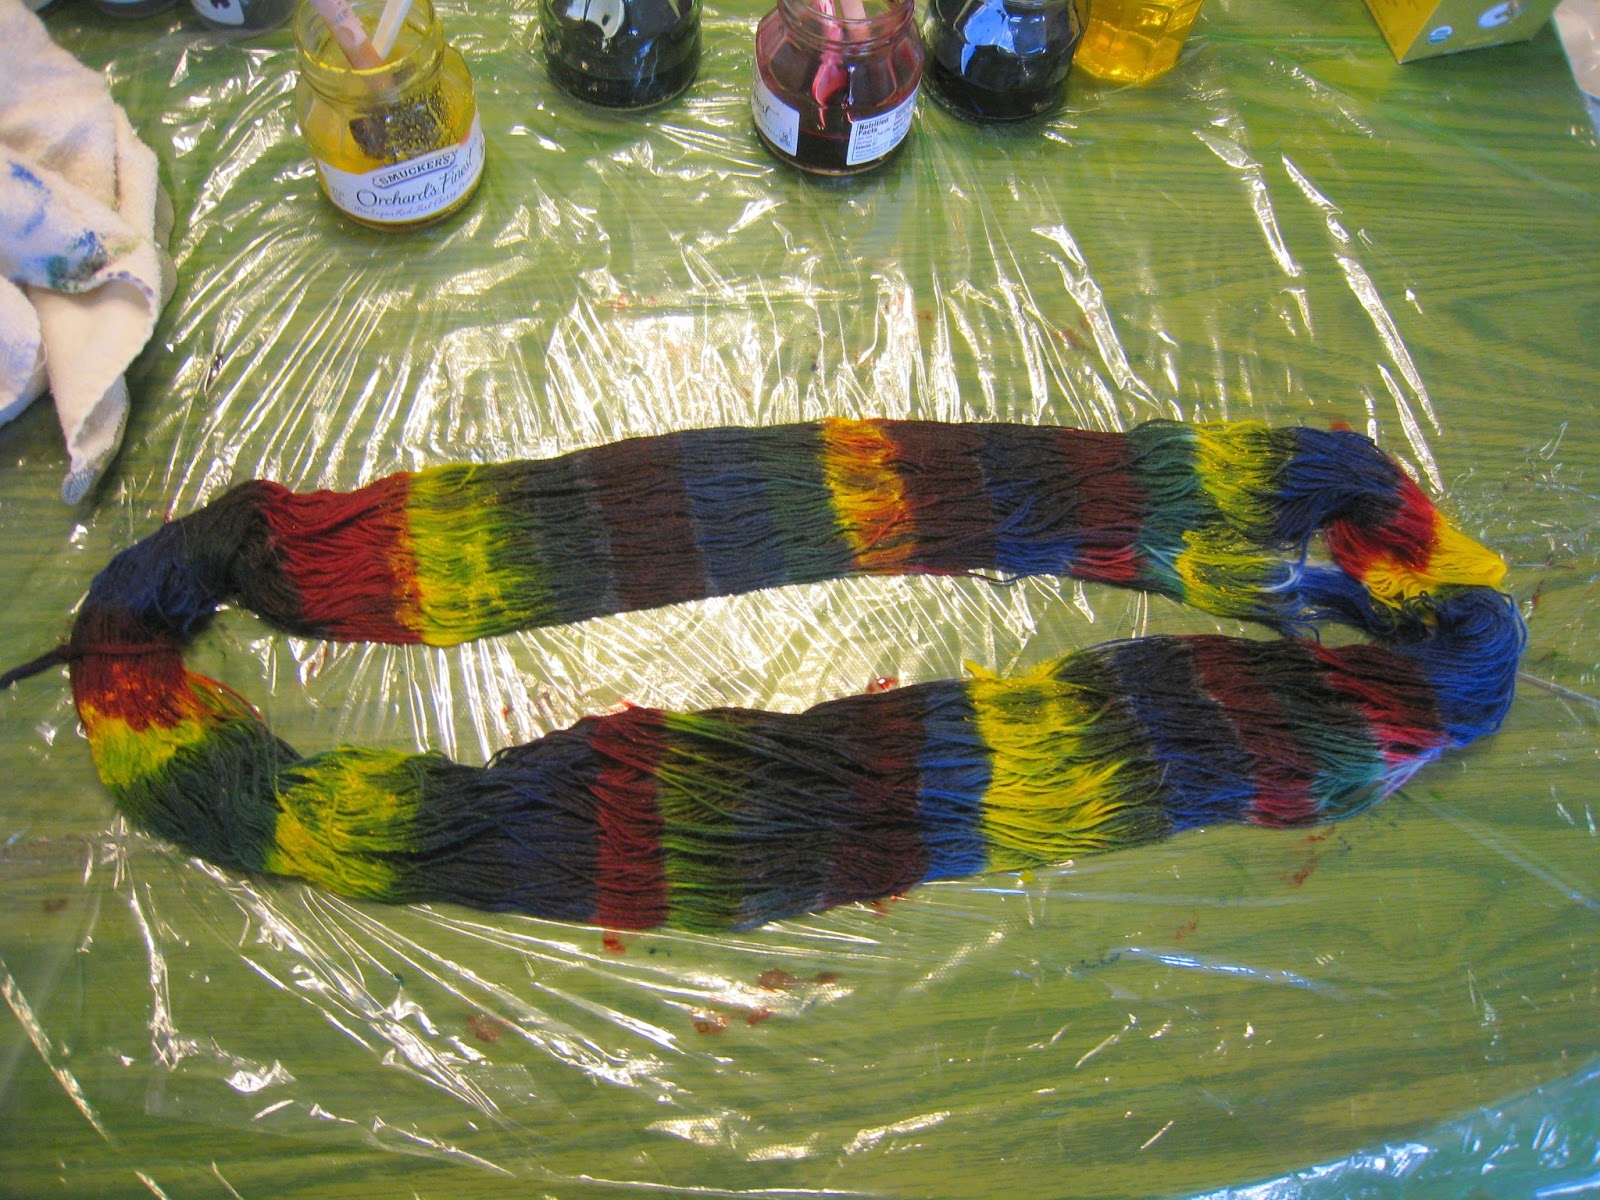 |
| Muddled colors after picking it up and turning it over. Added more dye to fill in the white spots. |
 |
| Yarn wrapped up like a jelly roll. |
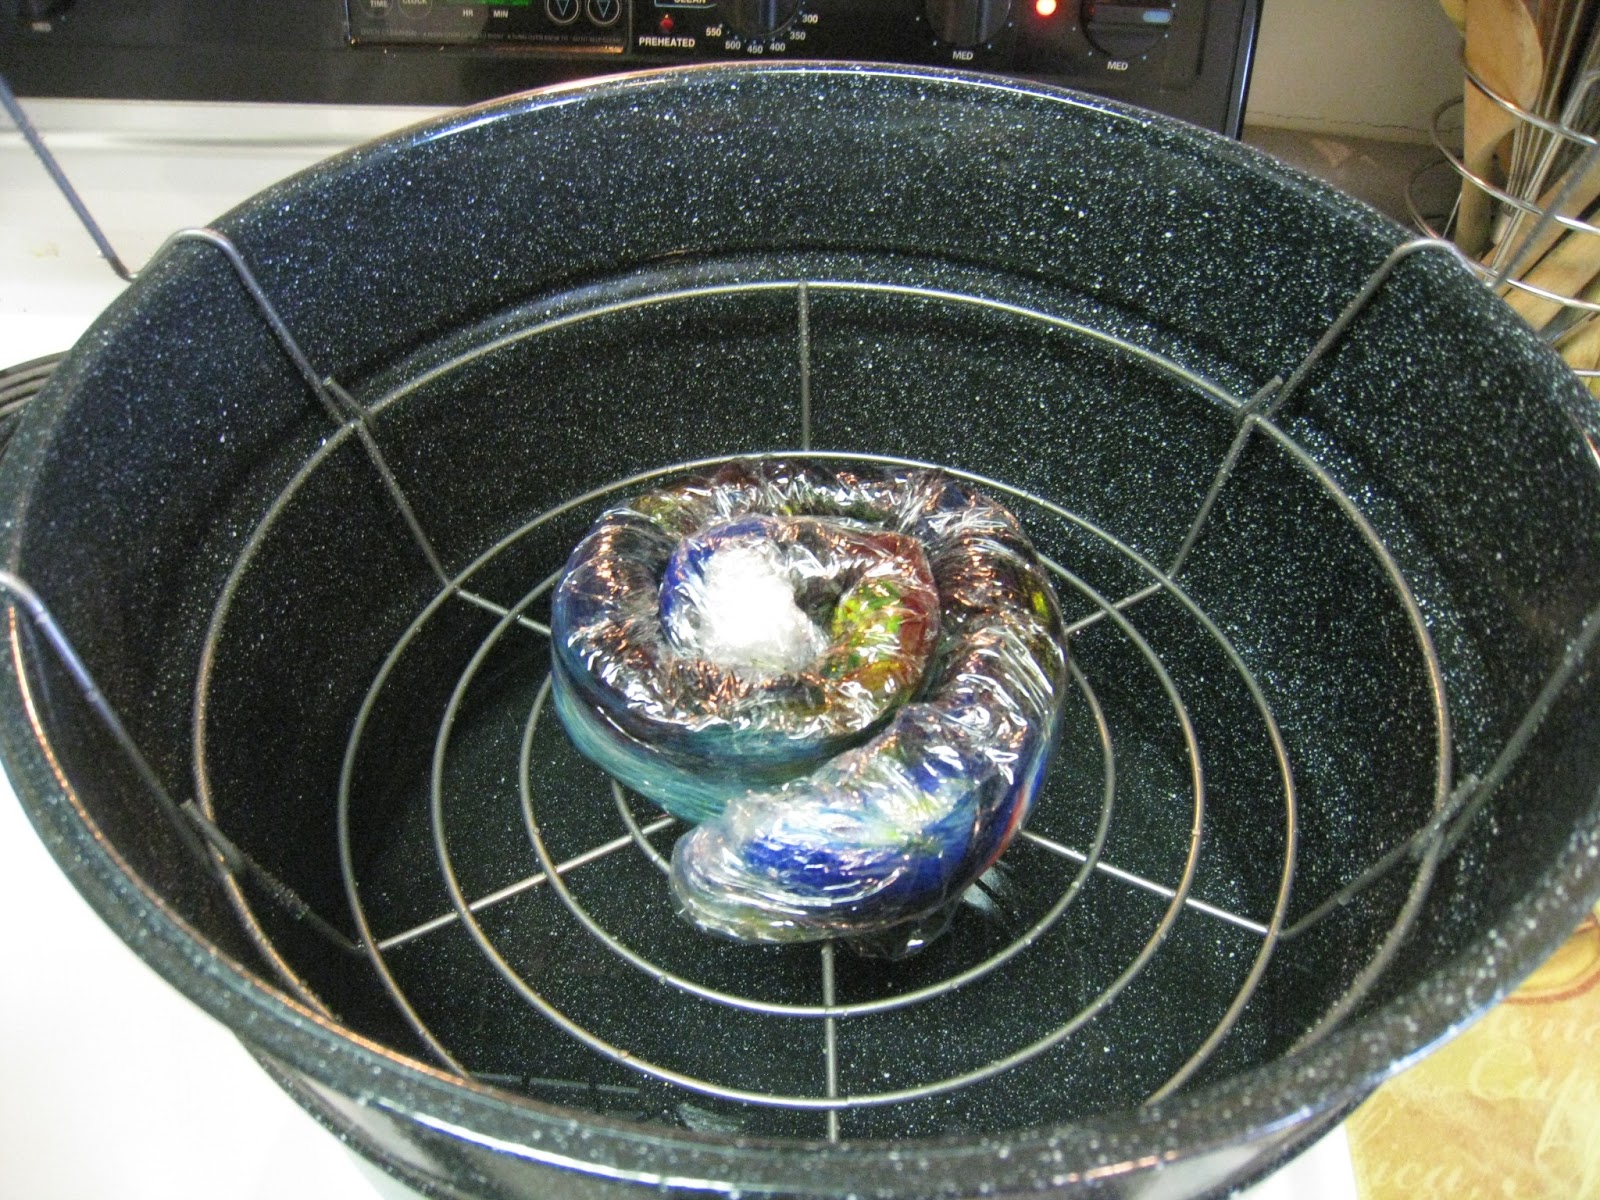 |
| Ready to steam in my HUGE canning pot. It looks so small in there. |

I rinsed the yarn over and over and let it soak with some vinegar water until it ran pretty much clear. Then hung it to dry on the clothing rack.
 |
| Yarn drying on my clothing rack. Bucket underneath to catch water. |
Gently pressed some of the excess soak water out and put the roving on the plastic wrap. I used Amazon Green, Ruby Red, River Blue, and Amethyst Purple. I started out sponge brush painting little sections, but at this point, I was tired, and didn't want to continue doing that. Instead, I just start dabbing colors all over the place. Then I turned it over, and did the same thing on the back. Random splotches of color all over the place!
 |
| Ready to paint again! |
 |
| Started off painting strips, but then got really tired and bored, so started to just go CRAZY! |
 |
| Dotting colors EVERYWHERE! |

 |
| Steaming my roving on the stove. |
 |
| Drying the roving. |
MORE YARN!
Figured, while I had my dye stuff out, I'd go ahead and dye some more yarn.
This time I used Knit Picks Bare Superwash Wool Worsted Weight, 100grams. I soaked it in water only for 30 minutes or so. Set up my crockpot by a heaping teaspoon of River Blue in there and filling with water...maybe 6 cups or so, didn't measure. Then turned it on HIGH for 30 minutes. Checked the temp and it was 100 degrees F, so put the yarn in at that point, moved it around a bit, and added 2 Tbs of citric acid. Checked the temp again at 20 minutes. 140 degrees F, color was not fully exhausted. Put it on for another 20 minutes.
 |
| Yarn dyeing in my crock pot. |
The blue came out much better than last time I did it! Much more of a solid blue color with some darker spots rather than lighter spots like before.
THE RESULTS! :)
 |
| LOVE this yarn! This was the yarn I first dyed using the canning pot steamer method. I call it "Happenstance" |
 |
| The other side of "Happenstance" |
 |
| Pictures showing the different colors in "Happenstance" as I wind it into a cake. |


 |
| "Happenstance" all wound up into a cake, ready to knit! |
 |
| Really happy with how this turned out! Again, mistakes can lead to some great color combinations sometimes! |
 |
| My colorful roving! It may not look so great now, but I think it's going to spin up into something lovely! I am calling this one "Muddled Mystery." |
 |
| And my blue yarn! I shall name this one "Royal Twilight." |
 |
| All caked up and ready to knit! |

LESSONS LEARNED:
*Mistakes can cause some gorgeous colorways.
*Mistakes can cause some gorgeous colorways.
*Be careful picking up and turning over your hand painted yarn or roving.
*Be sure to cook your yarn long enough to exhaust the colors. 20 minutes is NOT long enough!
*How to make dye stock using Greener Shades dyes.
They all look great! Thanks for the tip Oreo. ;)
ReplyDeleteSorry about the miscommunication!
ReplyDeleteThat was to heat it to 200 degrees, then keep it at 200 degrees for 20 minutes.